皆さん、こんにちは。ここぽてとです。今日もデイトラ学習記録を書いていきます。やっと本日でDAY16を終わらせられそうです。
今回はボタンをコーディングしていく課題です。
前回と前々回の見出し編①②はこちらから↓
準備編
今回も後で色変えや大きさを一括で変えられるように、定義しておきます。HTMLは一応全体がわかるように入れています。
$main-color:#3F51B5;
$btn-width:240px;
$btn-fz:16px;

.button{
  text-align: center;
  align-items: center;
}
<div class="button">
<a href="#" class="btn1">ボタンはこちら1</a>
<br><br>
<a href="#" class="btn2">ボタンはこちら2</a>
<br><br>
<a href="#" class="btn3">ボタンはこちら3</a>
<br><br>
<a href="#" class="btn4">ボタンはこちら4</a>
<br><br>
<a href="#" class="btn5">ボタンはこちら5</a>
<br><br>
<div style="background: #333; padding: 30px; 0">
<a href="#" class="btn6">ボタンはこちら6</a>
<br></div>
<br>
<a href="#" class="btn7">ボタンは<br>こちら7</a>
<br><br>
<a href="#" class="btn7-2"><p>ボタンは<br>こちら7</p></a>
<br><br>
<a href="#" class="btn8">ボタンはこちら8</a>
<br><br>
<a href="#" class="btn9">ボタンはこちら9</a>
</div>ボタン 1〜9

<a href="#" class="btn1">ボタンはこちら1</a>.btn1{
display: inline-block;
width: $btn-width;
padding: 14px;
text-decoration: none;
font-size: $btn-fz;
font-weight: 700;
background: $main-color;
color: #FFF;
border-radius: 3px;
text-align: center;
cursor: pointer;
}
<a href="#" class="btn2">ボタンはこちら2</a>.btn2 {
display: inline-block;
width: $btn-width;
padding: 14px;
text-decoration: none;
font-size: $btn-fz;
font-weight: 700;
background: $main-color;
color: #FFF;
border-radius: 3px;
cursor: pointer;
position: relative;
&::after {
content: "";
position: absolute;
background: url(../img/arrow.png) no-repeat center center / contain;
transform: translateY(-50%);
top: 50%;
right: 16px;
width: 15px;
height: 17px;
}
}▲を表示させるのに、背景プロパティを使うとは思わなかった。background-size = contain 背景画像全体が見えるということらしい。

<a href="#" class="btn3">ボタンはこちら3</a>.btn3 {
display: inline-block;
width: $btn-width;
padding: 14px;
text-decoration: none;
font-size: $btn-fz;
font-weight: 700;
background: $main-color;
color: #FFF;
border-radius: 3px;
cursor: pointer;
position: relative;
&::after {
content: "";
position: absolute;
background: url(../img/arrow.png) no-repeat center center / contain;
transform: translateY(-50%);
top: 50%;
right: 50px;
width: 15px;
height: 17px;
}
}ボタン2とほとんど同じだけど、&::afterの中のrightを50pxにして、矢印の位置を調整しています。もっと他に良いやり方があるかも?

<a href="#" class="btn4">ボタンはこちら4</a>.btn4{
display: inline-block;
width: $btn-width;
padding: 14px;
text-decoration: none;
font-size: $btn-fz;
font-weight: 700;
background: $main-color;
color: #FFF;
box-shadow: 0 4px 0 #25379B;
border-radius: 3px;
text-align: center;
cursor: pointer;
}
<a href="#" class="btn5">ボタンはこちら5</a>.btn5{
display: inline-block;
width: $btn-width;
padding: 14px;
text-decoration: none;
font-size: $btn-fz;
font-weight: 700;
background: transparent linear-gradient(to bottom, #3F51B5, #20295B 100%);
color: #FFF;
border-radius: 3px;
text-align: center;
cursor: pointer;
}linear-gradient(to bottom, #3F51B5, #20295B 100%);で”to bottom”にすると下へ降りるにつれてグラデーションになるというイメージ。to の後ろには「top」「right」「bottom」「left」を記述することが出来ます。

  <div style="background: #333; padding: 30px; 0">
  <a href="#" class="btn6">ボタンはこちら6</a><br></div>
.btn6{
display: inline-block;
width: $btn-width;
padding: 14px;
text-decoration: none;
font-size: $btn-fz;
font-weight: 700;
background: transparent;
border: solid 2px #fff;
color: #FFF;
text-align: center;
cursor: pointer;
}背景の色をボタンにも適用したい場合は、”background: transparent;”を使います。
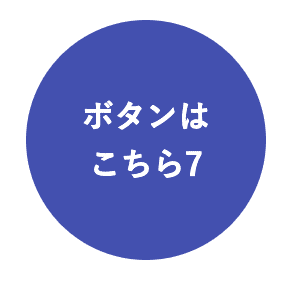
7だけ2種類作ってみたので、コード2種類貼っています。
<a href="#" class="btn7">ボタンは<br>こちら7</a>.btn7{
display: inline-block;
text-decoration: none;
font-size: $btn-fz;
background: $main-color;
color: #FFF;
width: 120px;
height: 120px;
border-radius: 50%;
line-height: (24/16);
display: flex;
justify-content: center;
align-items: center;
}<ポイント>
- 丸いボタンを作りたいときは、ボタンクラスのwidthとheightを同じ大きさにして、border-radiusを50%にする。
- 改行した文字を左右中央に置きたい場合は、“display: flex;” “justify-content: center;” “align-items: center;”を使う。
<a href="#" class="btn7-2"><p>ボタンは<br>こちら7</p></a>.btn7-2{
display: inline-block;
text-decoration: none;
font-size: $btn-fz;
background: $main-color;
color: #FFF;
width: 120px;
height: 120px;
border-radius: 50%;
line-height: (24/16);
align-items: center;
p{
padding: 20px 20px;
}
}改行した文字を左右中央に置きたい場合は、他にもテキスト自体(ここではp)に”padding”を使って均等に余白をつけて表示させることも可能です。”display:flex;”よりもこちらの方が簡単なので実務として使うならこっちを使っていくかも。

<a href="#" class="btn8">ボタンはこちら8</a>.btn8 {
display: inline-block;
width: $btn-width;
padding: 14px;
text-decoration: none;
font-size: $btn-fz;
font-weight: 700;
background: $main-color;
color: #FFF;
border-radius: 115px;
cursor: pointer;
position: relative;
&::after {
content: "";
position: absolute;
background: url(../img/arrow.png) no-repeat center center / contain;
transform: translateY(-50%);
top: 50%;
right: 16px;
width: 15px;
height: 17px;
}
}
<a href="#" class="btn9">ボタンはこちら9</a>.btn9{
display: inline-block;
width: $btn-width;
padding: 14px;
text-decoration: none;
font-size: $btn-fz;
font-weight: 700;
background: $main-color;
color: #FFF;
border-bottom: solid 3px#25379B;
text-align: center;
cursor: pointer;
}感想
見出しのコーディングよりは簡単だったように思います。見出しからずっとコーディングしてきて、ボタンの学習で以前より”position: absolute;”を使いこなせるようになってきたかな?と思います。よく使いそうなボタンはnotionに登録して、ガンガン使っていきたいと思います。
